
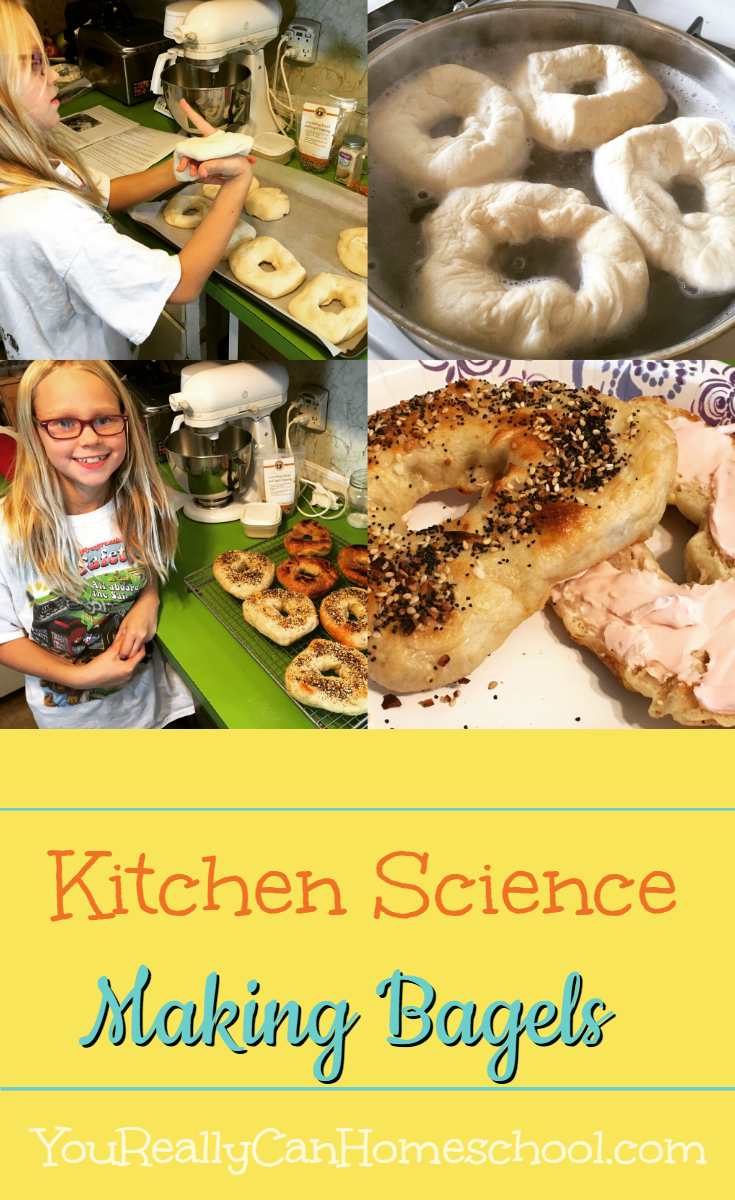
My kiddo is in love with science, and she loves baking. She was intrigued when I told her baking is all about chemistry. I’m not sure she actually believed me. 🙂 We’d been talking about making bagels for a while, so it was a perfect time to show her baking is more than fun, it’s kitchen science!
I’m going to be honest, making these delicious New York style bagels is time consuming… but it is bread. However, while the dough is rising it’s a great time to dig into the science involved. 🙂
The Kitchen Science in Making Bagels
We found quite a few resources that helped us understand the science of baking bread and the differences between plain bread and bagels.
Here’s some bread science 101. This goes over the basics of yeast, and baking powder, and the basics of how it all works.
We supplemented this article with a couple videos. This one on the history of bread and the chemistry of yeast was quite engaging, and interesting.
We followed the youtube bunny trails and ended up watching this video on how bread rises, and this one on how yeast works in bread and this one on the chemistry of baking. There are probably a thousand more videos you can watch, but after a while it becomes the same info over and over, so these were a great start.
We continued reading (It does take an hour and a half for the dough to rise!) this article on the chemistry of bread, and finally we read this article talking about the differences in preparing bagels vs. making bread. This is the one that explains that whole boiling of bagels thing, why it’s important and what it does for your bagels.
When our bagels were finished we topped off the day with an episode of Good Eats. It’s one of our favorite kitchen science (and history) shows. 🙂 The episode on bread is called Mr. Strangeloaf and Alton did a great job of explaining the process. (It’s Season 8 Episode 15 or you can find it here.)
So onto the recipe and the making bagels.
New York Bagel Recipe
 Here’s what you need:
Dough
1 tablespoon instant yeast
4 cups (17 ounces) King Arthur Unbleached Bread Flour
2 teaspoons salt
1 tablespoon non-diastatic malt powder, brown sugar or barley malt syrup
1 1/2 cups (12 ounces) water, lukewarm
Water Bath
2 quarts (64 ounces) water
2 tablespoons non-diastatic malt powder, brown sugar or barley malt syrup
1 tablespoon granulated sugar
We used our Kitchen Aid mixer (my favorite kitchen gadget) so I’ll share the directions for that process. You could knead the dough by hand as well.
Here’s what you do:
Pour all the ingredients into your mixer bowl. Using your dough hook attachment, turn it on medium high, and set the timer for 10 minutes. We’re using high gluten flour so you need to let it knead for a while to develop the gluten.
This dough is very stiff, and will form a solid ball as the ingredients combine. It will probably try to climb out of your mixer, just push it back down.
When you stop the mixer the dough will hold its shape, not spread out at all. After the 10 minutes of mixing you’re going to take the dough and put it in a lightly greased bowl. (A large bowl). Let it rise for 1 to 1 1/2 hours. The dough will rise, but it won’t necessarily double in size, and that’s ok.
The next step is to transfer the dough to a lightly floured work surface. You’re going to divide this big ball of dough into 8 pieces. I rolled it out into a bit of a log shape so I could evenly cut the pieces.
Take each of these 8 pieces and roll it into a ball. (If you watch the Good Eats Dr. Strangeloaf episode he shows you a great technique for this step ~ I wish we’d watched it first.)
Set the balls on a baking sheet covered in parchment paper. When all the balls are formed cover with plastic wrap.
Let the balls rest for 30 minutes. They will puff up a little. This is where it starts to get fun.
During this 30 minutes you’re going to want to get your oven preheated to 425 and bring your water bath to a boil.
You want to use a wide pan so you can get 4 bagels in the water bath at the same time. Heat the water, malt and sugar until it comes to a gentle boil.
When your 30 minutes is up you’re going to take each of the balls and poke one of your fingers through it. It will be harder than you think, and that’s ok. (That’s the gluten hard at work.)
Once your finger is through the ball you’re going to spin it around (gently) to create a larger hole through your dough. You want to get the hole to about 2 inches, the whole bagel will be about 4 inches across.
Set the bagels down on the parchment paper and put holes in the rest of the dough balls. When that’s done you’re going to place them 4 at a time in the water bath. Make sure your water bath is at a rolling boil.
Cook for 2 minutes, then flip over and cook for 1 more minute.
Do this process again for the next 4.
Whisk an egg until it’s frothy and add a tablespoon of water and whisk it together to create an egg wash. Paint the bagels with the egg wash, you can add the toppings now if you wish, or just leave them plain. (We used everything topping, as those are my favorite! We also sprinkled cinnamon/sugar mixture on a few, since I know I’m the only one here that likes everything bagels.) (Word of warning… the cinnamon bagels burn very easily in the oven. Hanna said they were still good, but the sugar on top definitely burnt. I might try baking them first then spreading melted butter on them and adding the cinnamon sugar at the end.)
** Note: I have baked one and two batches at a time, baking one tray at a time produces much more golden brown bagels. So if you can fit all your bagels on one pan, it’s a good idea.
Bake for 20-25 minutes or until golden brown. Make sure you flip them over at about 10 minutes to get both sides wonderfully brown. When I flipped mine the topping got a little scorched… I should have watched it a little closer instead of counting the time.
Remove them from the oven and let them cool completely on a wire rack (good luck with that).
These bagels are so delicious, and a fun way to dig into kitchen science. I have found the more hands on and relevant to real life the learning is in our house, the more is retained. This was definitely one of those projects.
Enjoy your bagels, and the kitchen science!


Pinned this. Thanks so much for sharing the video and other resources. This is great and I can’t wait to have a kitchen science day with my son.
Thanks!! Our favorite science is found in the kitchen. 🙂 <3
Awesome thanks! We will be watching this as the bread bakes <3